


We've all been there—you buy a t-shirt you love, but it's just a little too big. The good news? You can often fix this with a bit of heat and some laundry-room know-how. The most reliable way to shrink a tee is by using high heat and agitation in your washing machine and dryer. A hot water wash followed by a spin in the dryer on high heat is usually all it takes to make the natural fibers contract, turning a baggy shirt into your new favorite.
The Art of the Perfect Fit: Why Shrinking Tees Is a Brooklyn Thing
In Brooklyn, style isn't just worn; it's crafted. From the Dumbo street art scene to the indie boutiques of Williamsburg, this is a borough built on creative expression. Nailing the perfect t-shirt fit is a quiet statement, a nod to a culture where individuality reigns supreme. Learning how to shrink a t-shirt isn't a chore; it's a rite of passage for personalizing your look.
For many, this skill was born out of the borough's unique rhythm. Brooklyn is famously the birthplace of the modern flea market, with legendary spots like the Brooklyn Flea drawing crowds searching for vintage treasures. Often, those one-of-a-kind finds need a little tweaking. Mastering the art of shrinking means a vintage tee from the 90s can be tailored to fit perfectly today, preserving a piece of history while making it distinctly your own.
Embracing the Craft of Shrinking
This guide is about flipping the script—turning a laundry accident into an art form. We're not just making a shirt smaller; we're chasing that perfectly contoured, lived-in look that screams effortless cool. It all boils down to two key ingredients: heat and agitation.
Once you understand these forces, you're in control.
- Heat: Hot water and hot air work together to relax the tension in fabric fibers (especially cotton), causing them to contract and tighten.
- Agitation: The tumbling and spinning in your washer and dryer enhance this effect, helping the fibers shrink more evenly.
Shrinking a t-shirt is like giving it a new life. It’s an opportunity to take something mass-produced and make it feel like it was made just for you—and that’s the very spirit of Brooklyn style.
The Science Behind the Style
When you shrink a t-shirt, you're not just guessing—you're working with a known textile science. On average, a 100% cotton shirt will shrink about 3–5% on its first high-heat wash and dry cycle. Industrial laundry settings can even see shrinkage up to 7%.
This is a familiar reality in dense urban areas. It's a little-known fact that Brooklyn has more residents than San Francisco, Boston, and Washington, D.C., combined, leading to a vibrant laundromat culture. This guide will teach you how to master this process. You'll learn the secrets to the hot wash and dry, how to protect your favorite graphic prints, and even how to do "spot shrinking" for a truly custom fit. Whether you’re tweaking a vintage find or perfecting the fit of your favorite Brooklyn brand clothing, consider this your first step toward mastering the art of the perfect tee.
Know Your Fabric Before You Start Shrinking
Before you even think about cranking up the heat, you’ve got to get personal with your t-shirt. Think of it this way: every fabric has its own personality, its own set of rules. Understanding what you're working with is the single most important part of this whole process. It's your secret weapon against accidentally turning that perfectly oversized tee into a shirt fit for a toddler.
Imagine you snagged a vintage-style tri-blend at a flea market under the Brooklyn Bridge—it's got that priceless, worn-in softness. Now, picture a brand-new, heavyweight cotton tee from a local Bushwick brand. You wouldn't treat them the same, right? Of course not. And you definitely can't shrink them the same way. The fabric's story tells you exactly how it's going to behave.
The Power of 100% Cotton
When it comes to shrinking, pure cotton is the undisputed champion. During the manufacturing process, its natural fibers get spun, stretched, and pulled under a ton of tension. The moment you introduce hot water and heat, those fibers finally get to relax and snap back to their more natural, compact state.
This is why 100% cotton is your best friend for a custom fit. A single trip through a high-heat wash and dry cycle can shrink it by a very noticeable 3-5%. It's the most predictable and rewarding material to work with when you’re dialing in that perfect size.
Navigating Cotton Blends and Preshrunk Labels
Now, let's get into the blended fabrics. That classic 50/50 cotton/poly tee you love? The polyester fibers are synthetic and totally unfazed by heat. They act like a sturdy frame, preventing the cotton fibers from contracting too much. You'll get a little bit of shrinkage, but it'll be far more subtle.
This is even more true for those drapey tri-blends, which usually mix cotton, polyester, and rayon. They’re designed from the get-go to have that lived-in feel and barely shrink at all. They've got their own kind of effortless cool.
Don't let a "preshrunk" label on a cotton tee fool you. All it really means is the manufacturer already did the heavy lifting for you. There's almost always a little more room to shrink it down—usually an extra 1-3%—which can be just what you need for that final, perfect tweak.
Knowing your fabric isn’t just about damage control; it's about being intentional. This is especially true for those graphic tees that tell a story—perhaps one celebrating the fact that if Brooklyn were its own city, it would be the fourth largest in the United States. You want to shrink the shirt, not destroy the art. To keep those designs from cracking and fading while you get the fit just right, it’s worth learning the best practices for how to wash graphic tees. After all, your clothes are an extension of your creativity—treat them that way.
The Classic Hot Wash and Dry Method
When it comes to shrinking a t-shirt, there's a reason the old-school hot wash and dry method is still the go-to. It’s the first thing most of us think of, and honestly, it’s a classic because it just works. This technique uses the simple, powerful combination of heat and agitation to turn a shirt that's "just okay" into one that fits you perfectly.
It all starts with a hot water wash. This isn't your regular laundry cycle; you're intentionally using the heat to get the cotton fibers to relax and open up. Think of it as the first step in convincing the fabric to take on a new shape.
After the wash, the dryer is where the real transformation happens. Crank that machine up to its highest heat setting. This intense heat is what causes those relaxed fibers to contract and tighten, pulling the fabric together for that snugger, more tailored fit you're after.
The Art of Control and Precision
Here’s a pro tip: this isn’t a “set it and forget it” job. The biggest mistake people make is walking away and coming back to a shirt that’s two sizes too small. The secret to getting it just right is the 'check and repeat' approach.
Pull the shirt out of the dryer every 10-15 minutes while it’s still a bit damp. Go ahead and try it on. How does it feel? Is it getting closer? If it’s still too loose, just toss it back in for another short burst of heat. This little bit of hands-on attention prevents you from going too far and gives you total control over the final size.
This hands-on approach is where you become the tailor. You're not just blindly shrinking a shirt; you're actively sculpting it to your body. Each time you check, you're making a decision to get the fit exactly where you want it.
Of course, before you even start, you need to know what you're working with. Different fabrics react differently, so a quick check of the material is your first move.
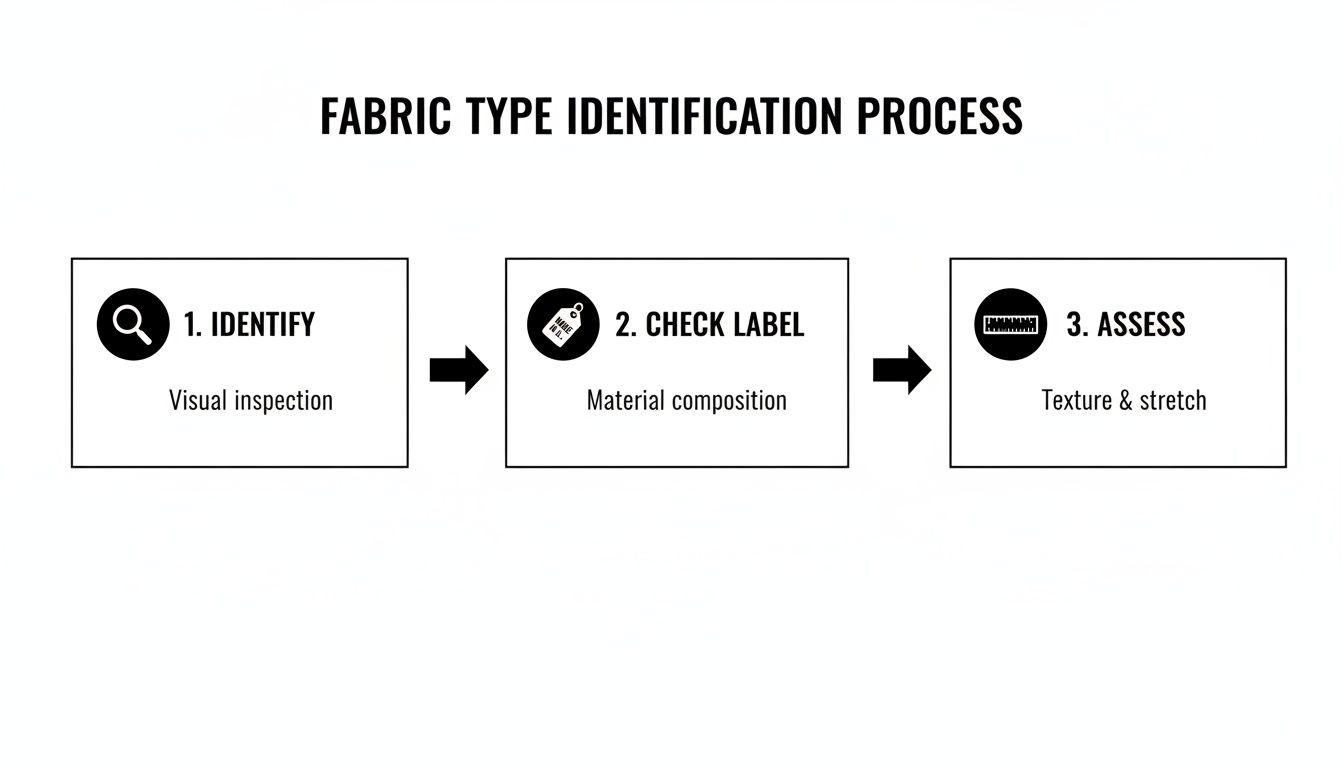
As the chart shows, identifying the fabric by checking the label is the essential first step to getting a successful, predictable result.
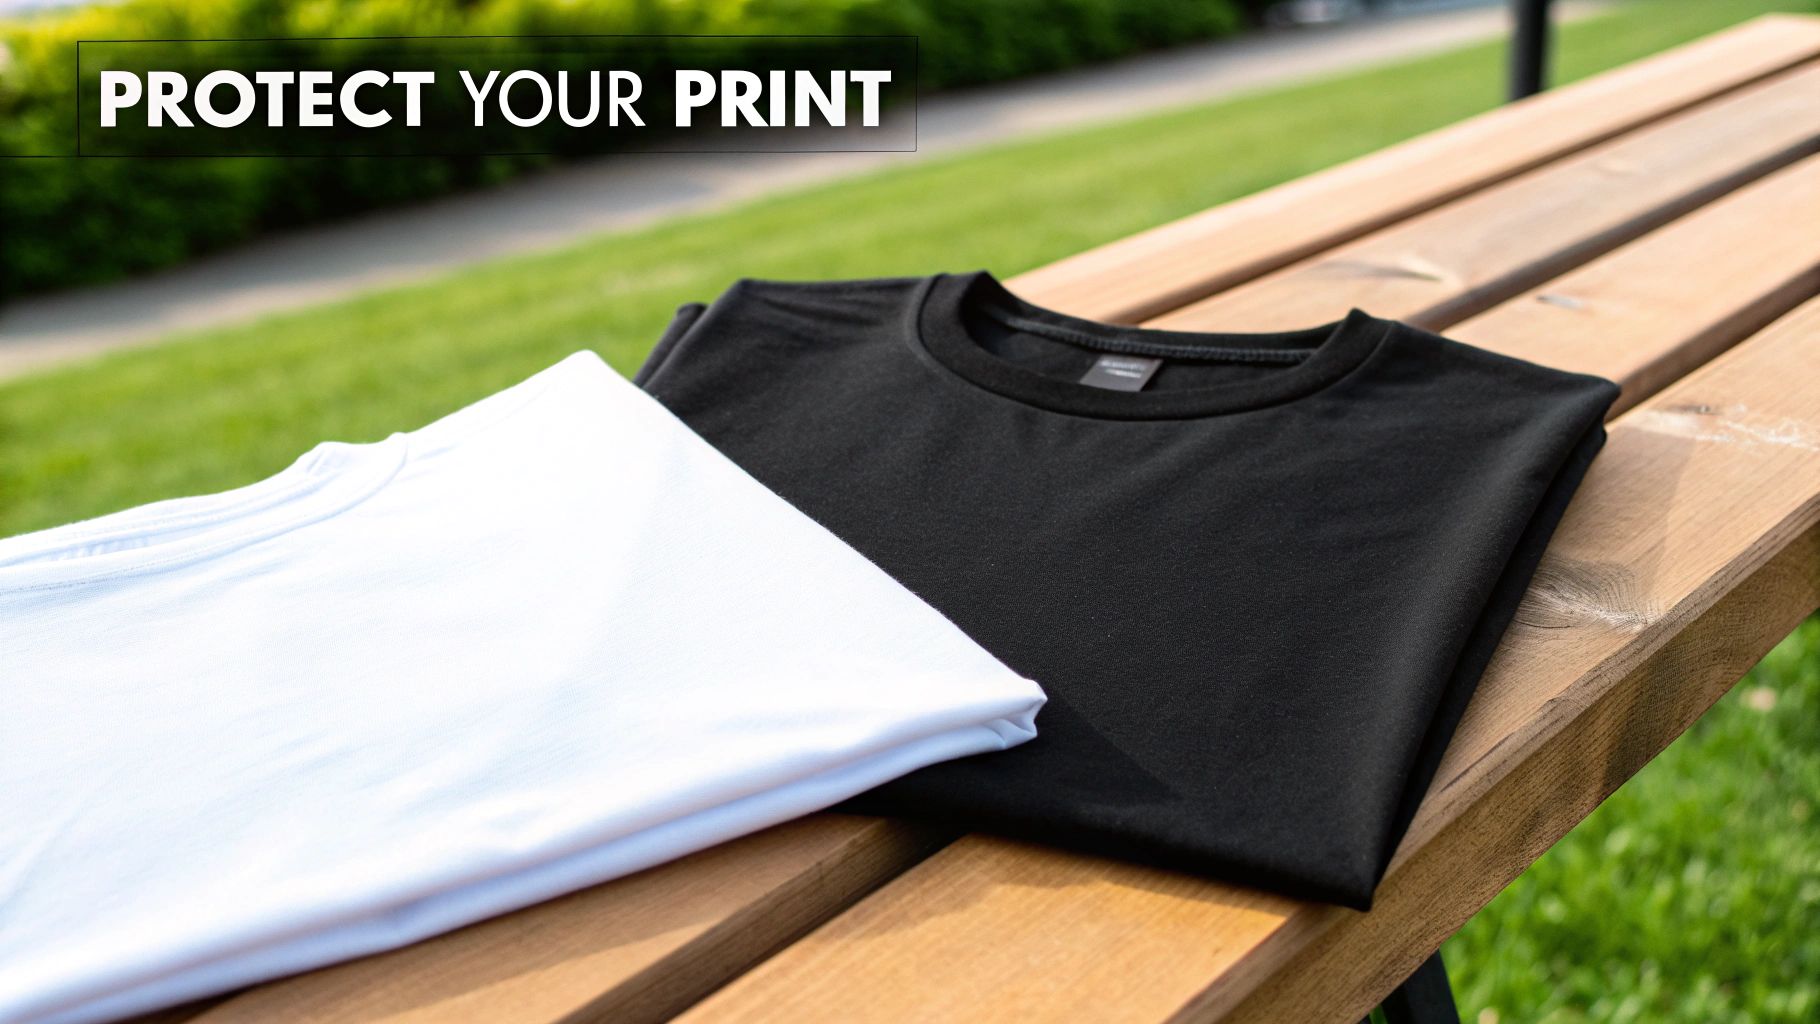
Protecting Your Prized Graphics
Shrinking a graphic tee adds another layer of complexity—you have to protect that awesome print. That design is the heart of the shirt, and the last thing you want is for it to crack, peel, or fade away.
The single best piece of advice I can give is this: always turn your shirt inside out before it ever touches the water or the heat.
This simple action creates a protective shield for the graphic. It prevents the print from rubbing directly against other clothes or the inside of the machine, which is the primary cause of damage. It’s a tiny step that makes a world of difference.
It turns out, a lot of people are doing this at home. With the global t-shirt market projected to hit around 20 billion units in 2024, a huge number of those shirts are getting resized after they're bought. Industry data shows that up to 40% of clothing returns are due to sizing issues, and about 20% of customers feel their new tee is just a little too big.
Considering that over 60% of American households have dryers that can easily top 135°F (57°C), the conditions are perfect for shrinking cotton tees. You can learn more about these fascinating industry trends from New Asia Garment. By mastering this classic method, you’re taking control and personalizing your wardrobe with skill and confidence.
Precision Shrinking for a Custom Fit
Sometimes, a full-on machine attack is just too much. The classic hot wash and dry is a fantastic go-to for an all-over shrink, but what happens when the body of your tee fits like a dream, but the sleeves are just a smidge too long? That’s when you need to get a little more strategic.
This is where the real art of personal style comes into play. It’s not about just accepting a shirt off the rack; it’s about making it undeniably yours. These more focused techniques are your secret weapons for getting that next-level, truly custom fit.
The Boiling Water Method: For When You Mean Business
Got a stubborn, high-quality 100% cotton tee that laughs in the face of your dryer? The boiling water method is the heavy hitter you need. This technique shocks the cotton fibers with intense, direct heat, forcing them to contract far more than they would in a standard wash. It’s a powerful move, so approach it with a bit of respect.
Here’s how to pull it off safely:
- Get the Water Ready: Grab a large, clean pot and fill it with enough water to completely cover the shirt. Bring it to a rolling boil.
- Time for a Dip: Turn off the heat. Using a pair of tongs (seriously, don't use your hands), carefully lower the t-shirt into the pot of hot water. Make sure the whole thing is submerged.
- Let It Steep: Now, just let it sit. For a little shrinkage, 5 minutes is a good starting point. For more significant results, you can leave it for up to 10 minutes or even longer. The more time it soaks, the more it will shrink.
- The Final Step: Once the water has cooled enough to handle, carefully pull the shirt out and wring out the excess water. From here, you can let it air dry for a more moderate result or throw it in the dryer on high heat to really maximize the shrinkage.
This is more than just a laundry trick; it’s about dedication. Taking the time to dial in the fit of your clothes shows an attention to detail that sets you apart. You're not just wearing a shirt; you're curating your look.
The Art of Spot Shrinking
For the ultimate control, spot shrinking is your best friend. This lets you tighten up specific areas without messing with the parts of the shirt that already fit perfectly. It’s a lifesaver for a stretched-out collar, baggy cuffs, or for cinching in the fabric around your shoulders.
All you need is a spray bottle filled with hot water and either a hairdryer or an iron. Just spritz the specific area you want to shrink until it's damp, then blast it with direct heat. Use your hairdryer on its highest setting or press the section with a hot iron. The localized heat forces just those fibers to contract.
Think of yourself as a sculptor, shaping the fabric exactly to your liking. It’s how you take a great shirt and transform it into an essential piece of your signature style.
How To Protect Your Graphic Tees
Shrinking a plain t-shirt is one thing. But when you’re trying to shrink that limited-edition graphic tee from your favorite local artist, the stakes are way higher. The art is the soul of the shirt, and the last thing you want is to damage the very design that made you buy it.
The whole process of shrinking a shirt relies on heat and friction—two forces that can be absolutely brutal on printed graphics. Our mission is to shrink the fabric, not to crack, peel, or fade the artwork. With a little bit of know-how, you can nail that perfect fit while keeping your designs looking crisp and bold.
The Golden Rule of Graphic Tee Care
If you take away just one tip, let it be this: always turn your graphic tees inside out before washing and drying. This single, five-second habit is your best defense against damage. It puts a layer of cotton between the delicate ink and the abrasive environment of your washing machine and dryer.
This simple flip protects the vibrant art that defines so much of Brooklyn's creative culture—from a shirt celebrating the Coney Island Mermaid Parade to one featuring a print from a Bushwick Collective artist.
Finding the Right Balance of Heat
Heat is your best friend when it comes to shrinking fabric, but it can be the mortal enemy of your shirt’s graphic. A common mistake is over-drying, which can essentially bake the ink, making it brittle and ready to crack as soon as you stretch the shirt over your body. The trick is finding that perfect middle ground.
- Start Hot, Finish Smart: Go for a hot wash cycle to kickstart the shrinking, but maybe pull back to a medium heat setting on your dryer.
- Check On It: Don't just set the timer and walk away. Pause the dryer periodically to feel the shirt, check the fit, and inspect the graphic. Is it still pliable? Is it shrinking evenly?
- The Air-Dry Finish: For those truly irreplaceable tees, you can get most of the shrinking done in the dryer and then pull it out while it’s still slightly damp. Let it air dry the rest of the way to play it extra safe.
It also helps to understand how your shirt was made. The screen printing process, for example, lays down a thick, durable layer of ink that can often handle heat better than other methods. Learning more about what is screen printing on fabric can give you a real appreciation for the craft and a better sense of what your tee can withstand.
Preserving the art on your tee is a sign of respect—for the artist, for the culture, and for your own personal style. It’s a small effort that speaks volumes about how much you value creativity.
Even when you do everything right, laundry can be unpredictable. But don’t panic if something seems a little off. Knowing how to troubleshoot can save a beloved shirt from becoming a regret.
Troubleshooting Common Shrinking Problems
Here’s a quick guide to tackling the most frequent issues you might face when trying to shrink your graphic tees.
| Problem | Likely Cause | Solution |
|---|---|---|
| Graphic is cracking or peeling. | Excessive heat and direct friction. | Turn the shirt inside out. Use medium, not high, dryer heat and check it frequently. Avoid over-drying. |
| Print looks faded or discolored. | High-temperature water and harsh detergents. | Stick to hot, not boiling, water. Use a color-safe detergent. For future washes, switch to cold water to preserve the color. |
| Shirt shrank too much. | Left in the high-heat dryer for too long. | While damp, gently stretch the shirt back to the desired size and let it air dry flat. Use lower heat next time. |
| Shirt didn't shrink enough. | Fabric is preshrunk or a polyester blend. | You may need a hotter cycle or even the boiling method, but accept that some fabrics have their limits. |
Mastering the art of shrinking a graphic tee is all about practice and paying attention. Once you get the hang of it, you’ll be able to customize the fit of any shirt in your collection.
Got Questions? We've Got Answers
Even when you've got the basics down, there are always a few lingering questions. It's often the small details that take a t-shirt from a decent fit to your absolute favorite. Let's tackle some of the most common "what ifs" that pop up when you're trying to get that perfect, custom-tailored feel.
Think of this as advice from someone who's been there—from countless laundry experiments and a few "oops" moments along the way. This is about giving you the confidence to nail the fit every single time.
Can I Really Shrink a 100% Polyester T-Shirt?
Honestly, trying to shrink a pure polyester shirt is a losing battle. Polyester is a synthetic, plastic-based fiber, and it’s heat-set during manufacturing specifically to prevent it from shrinking or losing its shape.
Pushing it with extreme heat won't shrink it; it'll just melt, warp, or permanently damage the fabric. If a polyester shirt doesn't fit right, your best bet is to find a good local tailor. It's a time-tested craft for a reason, and you'll get a precise fit without ruining your gear.
How Much Will a Preshrunk Cotton Shirt Actually Shrink?
Don't let that "preshrunk" tag fool you completely. While the manufacturer has already done the initial heavy lifting, there's almost always a little bit of shrink left in the tank. You can realistically expect an extra 1-3% of shrinkage from a preshrunk cotton tee.
This is perfect for making those tiny, final adjustments—taking a shirt from "almost perfect" to "just right." It's not going to drop you a full size, but it can be the ideal finishing touch to get a sharper, more defined fit.
Pro Tip: Think of it as the final edit. You're not rewriting the whole story, just tightening up a few sentences to make it perfect. That small adjustment is often all you need for that truly custom feel.
Help! I Shrank My T-Shirt Too Much. Now What?
We’ve all been there. You turn your back for a minute, and your go-to shirt comes out looking like it belongs to a toddler. Don't throw in the towel just yet—there's a solid rescue plan.
- Fill a sink or basin with lukewarm water.
- Mix in a generous capful of hair conditioner (the cheaper stuff works great!).
- Let the shirt soak for at least 30 minutes.
The conditioner helps relax the tangled cotton fibers, making them pliable again. After it's done soaking, gently squeeze out the excess water—don't wring or rinse it—and lay the shirt flat on a thick towel. Carefully stretch it back out to its original dimensions, then let it air dry flat. You’ll be surprised how much of its old self you can bring back.
Will Shrinking Ruin the Graphic on My Favorite Tee?
It definitely can if you're not careful. High heat and rough tumbling are the sworn enemies of a screen-printed graphic. The most important thing you can do is always turn the shirt inside out before washing or drying. This simple step creates a protective barrier between the print and the harsh interior of your machines.
For a tee with a graphic you love, find a happy medium. Use a hot wash cycle to get the shrinking process started, but then switch to a medium or low-heat setting on the dryer. Check on it frequently. This gives you enough heat to shrink the cotton without completely baking the ink and causing it to crack and peel. A little extra care ensures you get the fit you want without sacrificing the art.
At The Brooklyn Initiative, we make gear that’s as one-of-a-kind as the borough we call home. Find your next favorite tee and make it yours.