Learning how to screen print t shirts at home is all about bringing your unique vision to life, turning a simple piece of clothing into wearable art. The magic happens when you create a stencil on a mesh screen, press ink through it onto a shirt, and then heat-set the design to make it last. It’s a beautifully hands-on process that can transform any corner of your home into a creative studio.
From Brooklyn Streets to Your Studio
Screen printing is so much more than a hobby—it's a form of creative rebellion with deep roots in Brooklyn’s one-of-a-kind culture. Picture the bold, gritty graphic tees that capture the borough's independent spirit. This isn't just about printing a logo; it's about channeling the same energy that fueled the DIY music scene at legendary venues like Shea Stadium in East Williamsburg or the underground art shows in Gowanus warehouses. This is the very energy you’re about to channel.
With every pull of the squeegee, you’re joining a legacy of artists and makers who used this same method to share their message with the world, no permission needed. It’s a tradition that celebrates authenticity over perfection—a mindset born in a borough where, interestingly, more languages are spoken than in any other place in the US. You're stepping into that melting pot of ideas, creating something raw and real.
The best part of doing it yourself? The complete and total freedom it offers.
The Power of a Printed Tee
A screen-printed shirt is your personal canvas. It can be a piece of your art, a bold statement, or a shout-out to a hidden gem, like the century-old Sunny's Bar in Red Hook. It’s a genuine way to wear your story.
This hands-on craft lets you:
- Create Truly Unique Apparel: Forget fast fashion. Your designs will be 100% your own.
- Build a Community: Share your work with friends, family, or even launch a small brand. For inspiration, check out our guide on how to style oversized graphic tees, a true Brooklyn staple.
- Embrace Imperfection: Every single print tells a story. Those tiny variations aren't flaws—they're the signature of a handmade, authentic piece.
Before we dive into the nitty-gritty, let's look at the big picture. This table will give you a clear roadmap of the journey ahead, from a spark of an idea to a finished, wearable creation.
A Quick Look at the Home Screen Printing Journey
Understand the entire creative process at a glance. This roadmap breaks down the five key stages of turning a blank tee into a custom masterpiece.
| Stage | What You Will Do | The Creative Goal |
|---|---|---|
| Stage 1: Prep & Design | Gather your gear and finalize your artwork. | Set yourself up for a smooth printing session with a killer design. |
| Stage 2: Screen Prep | Coat your screen with emulsion and "burn" your design onto it. | Create a perfect, durable stencil of your artwork on the screen. |
| Stage 3: Printing | Align your shirt and screen, then pull the ink through. | Transfer your design cleanly and vividly from the screen to the fabric. |
| Stage 4: Curing | Use heat to permanently set the ink into the t-shirt. | Make your design durable enough to withstand washing and wear. |
| Stage 5: Cleanup | Clean your screen and tools thoroughly. | Prepare your equipment for your next brilliant project. |
Each of these stages is a skill in itself, but mastering them is what makes the final product so rewarding. Let's get started on the first one.
A Craft with Growing Influence
What begins as a fun project in your apartment can connect you to a massive movement. The demand for authentic, personalized clothing is exploding. The custom t-shirt printing market was valued at a huge $5.16 billion and is on track to hit an incredible $9.82 billion by 2030.
This phenomenal growth isn’t just driven by big corporations; it’s powered by creators just like you, who are turning personal passions into thriving small businesses, right from home.
You're not just making a shirt; you're joining a creative culture that thrives on individuality. This is your chance to add your voice to the visual language of the streets, one print at a time.
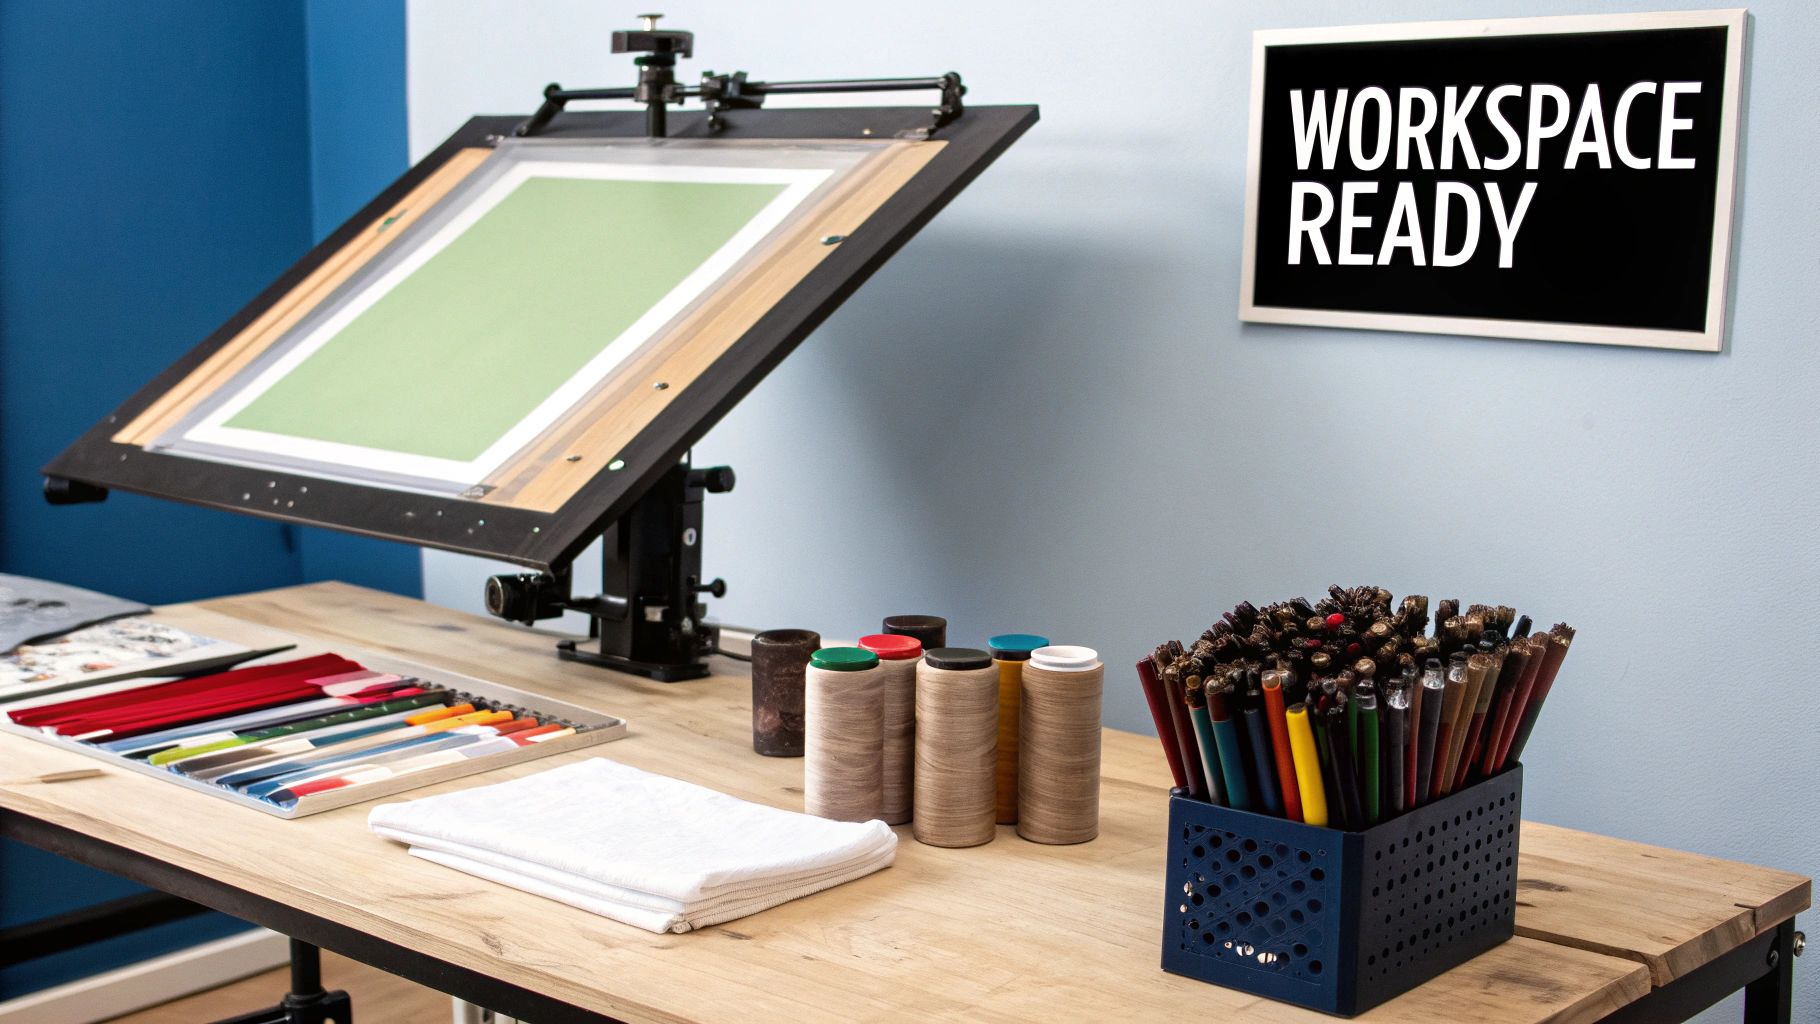
Assembling Your Home Screen Printing Studio
Every artist, from the loft dwellers in DUMBO to the muralists of the Bushwick Collective, started somewhere. They began by gathering their tools and carving out a space where ideas could become real. Your journey into learning how to screen print t-shirts at home starts the exact same way—by building your own personal studio.
This isn’t about sinking a ton of cash into expensive machinery. It's about curating a toolkit that feels like an extension of your creativity. Did you know Brooklyn is home to the Morbid Anatomy Museum, a space dedicated to the obscure and forgotten? Your studio can be your own personal museum of creation, a place where your unique ideas are preserved.
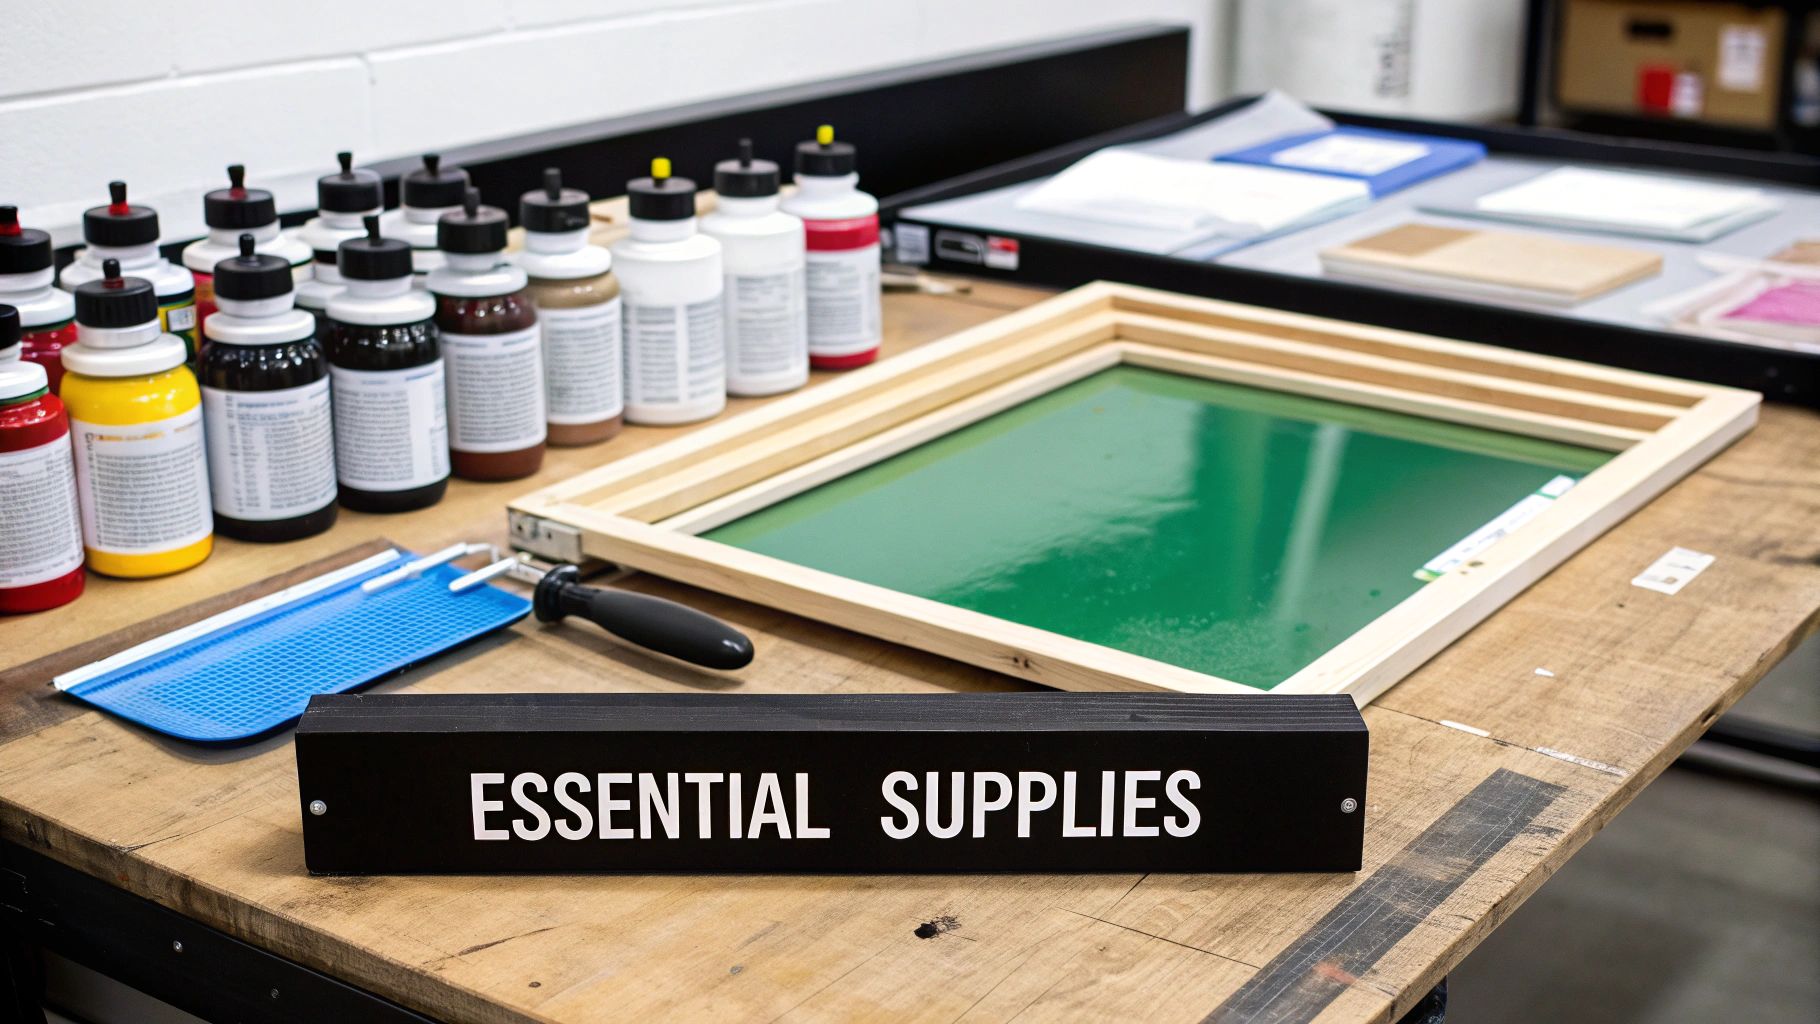
Your Essential Creative Arsenal
To get started, you don't need a sprawling warehouse. A clean table in the corner of your apartment and the right gear are all it takes. You've really got two main paths you can take: grabbing an all-in-one kit or hand-picking your supplies.
- All-in-One Kits: These are fantastic for diving right in. They package the essentials together, which removes the guesswork and lets you focus on just creating. It’s the perfect, no-fuss entry point.
- The A La Carte Approach: Building your own kit from scratch gives you total control. You can choose a squeegee with the perfect weight, grab specific ink colors you love, and experiment with different screen types. This path is for the creator who wants to fine-tune every part of their process from day one.
No matter which route you choose, the core components are the same. Think of them as your primary colors—the foundation of every single piece you'll create.
Decoding Your Screen Printing Gear
Walking into an art supply store can feel a little overwhelming at first, but understanding a few key tools will give you immediate confidence. Let's break down the most important pieces of your new studio setup.
The Screen Itself
Your screen is the heart of the whole operation. It’s a wooden or aluminum frame stretched tight with a fine mesh. The real magic is in the mesh count, which is just a way of saying how many threads there are per square inch.
A lower mesh count, like 110, has larger openings in the mesh. This lets more ink pass through, making it absolutely perfect for bold, graphic designs on t-shirts. Higher counts are better suited for super-fine, detailed prints on paper.
For that classic, punchy graphic tee look you'd see on the streets of Williamsburg, a 110-mesh screen is your go-to. It lays down a solid, vibrant layer of ink that really makes your design pop.
Ink: The Lifeblood of Your Design
Your choice of ink directly impacts how you print and what the final shirt feels like. For anyone just starting out, water-based inks are the undisputed champion.
Here’s why they’re perfect for a home setup:
- Easy Cleanup: Spills and used screens wash clean with just water. No harsh chemicals needed, which is a massive plus when you’re working in your apartment.
- Soft Feel: The ink actually soaks into the fabric's fibers instead of just sitting on top. This gives you a super-soft, breathable print you can’t even feel.
- Eco-Friendly: With no volatile solvents, they are a much more environmentally conscious choice.
You’ll see a lot about Plastisol ink, which is the industry standard for many mass-produced shirts. But it requires special chemical solvents for cleanup and higher curing temperatures, making it a lot less practical for a beginner’s home studio.
The Supporting Cast
Beyond the screen and ink, a few other players are crucial for bringing your vision to life.
| Tool | Its Creative Role | Why It Matters |
|---|---|---|
| Squeegee | Pushes the ink through the screen's stencil. | The durometer (hardness) affects the ink deposit. A medium (70) is a versatile workhorse for fabric. |
| Photo Emulsion | The light-sensitive liquid that creates your design. | This is what "burns" your artwork into the screen, turning it into a reusable stencil. |
| Scoop Coater | Applies a thin, even layer of emulsion. | An even coat is the secret to a sharp, detailed stencil and a flawless final print. |
Assembling these items is your first real creative act. It’s the moment you decide to turn a corner of your home into a launchpad for your art. You’re not just buying tools; you're building the foundation for everything that comes next.
Creating the Stencil: The Heart of Your Design
This is where the magic really begins. That design you’ve perfected on your screen is about to jump into the physical world. Creating the stencil isn't just a technical step; it feels a bit like alchemy—turning light and liquid into a precise, reusable tool for your art. It’s a quiet, focused part of learning how to screen print t-shirts at home that has a bit of that raw, creative energy you find all over Brooklyn, from the community gardens of Bed-Stuy to the experimental theaters in Bushwick.
The whole process relies on photo emulsion, a light-sensitive liquid that hardens when hit with UV light. If you've ever played around with old-school film photography, the concept is similar. You're essentially working in a darkroom to create a negative. But instead of a photograph, you're developing a perfect gateway for your ink. This stencil is the soul of your print, and nailing it is the secret to getting those crisp, professional-looking shirts that capture every last detail.
Coating Your Screen: A Perfect Canvas
First things first, you need to coat your screen with a thin, perfectly even layer of emulsion. This has to be done in a dark room—any stray sunlight will ruin your screen. I recommend using a low-wattage yellow "bug light" as your only light source, since its specific wavelength won't harden the emulsion prematurely.
Consistency is everything here. You’ll be using a tool called a scoop coater, which is designed to lay down a flawless sheet of liquid. Pour your emulsion into the coater, hold your screen upright, and press the edge of the coater against the bottom of the mesh.
Here’s my method for getting that smooth, even layer:
- Angle and Pressure: Tilt the coater just enough for the emulsion to make contact with the mesh. You want gentle, steady pressure—don't force it.
- The Pull: In one smooth, continuous motion, pull the coater all the way up the screen. If you're doing it right, you should hear a soft "zip" sound. That’s the sound of a perfect coat.
- Both Sides Matter: Lay down one coat on the t-shirt side of the screen (the flat side), then flip it and do one more coat on the squeegee side (the recessed side). This creates a much stronger, more durable stencil.
Once it's coated, the screen needs to dry completely in total darkness. I always set mine to dry with the t-shirt side facing down. You can put a fan in the room to speed things up, but honestly, patience is your best friend here. A perfectly dry screen is the only foundation for a crisp stencil.
The explosion of DIY screen printing is a huge nod to our growing desire for personalization and craft. This movement is a big part of what’s powering the global custom t-shirt printing market, which has ballooned to an estimated $8.17 billion. You can explore more about this incredible market growth that’s being fueled by creators just like you.
Burning Your Design with Light
With your screen fully dried, it’s time for the most exciting part: exposing your design. For this, you’ll need your artwork printed in solid black on a transparency film, your coated screen, and a light source. You don't need a fancy, professional exposure unit to start. A simple 500-watt halogen work light from the hardware store works like a charm.
Set up by placing a piece of black fabric on a flat surface. Lay your screen on top (flat side up), and then position your transparency onto the screen. Crucial tip: Make sure the image is backward so the final print comes out correctly. A piece of clear glass laid over the top will keep the film pressed tightly against the screen, which is the key to getting super sharp lines.
Now, set up your light source about 12-16 inches above the screen and flick it on. The UV light will penetrate the clear parts of your transparency, hardening the emulsion around your design. Meanwhile, the black ink of your artwork blocks the light, leaving the emulsion underneath soft and unexposed.
The Washout and the Reveal
Exposure time is a delicate dance; it’s going to vary depending on your light source and emulsion. But a great starting point for a 500-watt bulb is around 10-12 minutes. If you don't expose it long enough, your stencil will be slimy and wash right down the drain. Too much time, and even the finest details of your design will harden, making them impossible to wash out.
After the timer goes off, take your screen to a sink or bathtub. Start gently spraying it with lukewarm water on both sides. Almost immediately, you’ll see the unexposed emulsion—your design—start to soften and dissolve.
This is the big reveal. As you gently wash, the areas that were blocked by your artwork will clear away, leaving a perfect, clean stencil embedded in the hardened emulsion. Once all the soft gunk is gone and you can see light clearly through your design, let the screen dry completely. That's it. You've officially captured your art in a screen, ready to be printed, shared, and worn.
Pulling Your First Print: Bringing Your Design to Life
This is the moment. All the prep work, the creative wrestling, the patience—it all comes down to this single, satisfying pull. There's a special kind of magic in learning how to screen print t shirts at home, and this is the most exciting part. It’s where your idea finally jumps from a screen into the real world.
Think of it as a performance. You’re about to transform a blank piece of fabric into a statement, a piece of wearable art. This is where your vision becomes something tangible, something you can hold, wear, and share. Let's get it right.
Setting the Stage for a Perfect Print
Before you even think about ink, let's talk setup. A crisp, professional-looking print is born from a steady, unmoving canvas.
First things first, lay your t-shirt completely flat on your printing surface. If you’re using a press with adhesive, you're all set. If not, don't skip this: a light mist of spray adhesive on your board is a game-changer. It holds the shirt perfectly still, preventing any disastrous shifting.
Take an extra second to smooth out every wrinkle and fold. Any movement or bump in the fabric is a surefire way to get a blurry, smudged print. This little bit of care is what separates a frustrating mess from a flawless transfer.
Your First Move: The Flood Stroke
Ready for some ink? We're going to start with a pro technique called a flood stroke. This is where you gently pull a thin layer of ink across your design without pressing it through the mesh. Why? It primes your stencil, filling it with ink so your actual print is smooth, solid, and even.
Pour a bead of ink at the top of your screen, just above the design. Now, holding your squeegee at a low angle, lightly glide the ink down over the stencil. No real pressure here—you're just gently frosting a cake. This one simple move makes a massive difference in getting a vibrant print on the first go.
This simple infographic gives you a great visual of how a creative spark becomes a physical tool ready for ink.
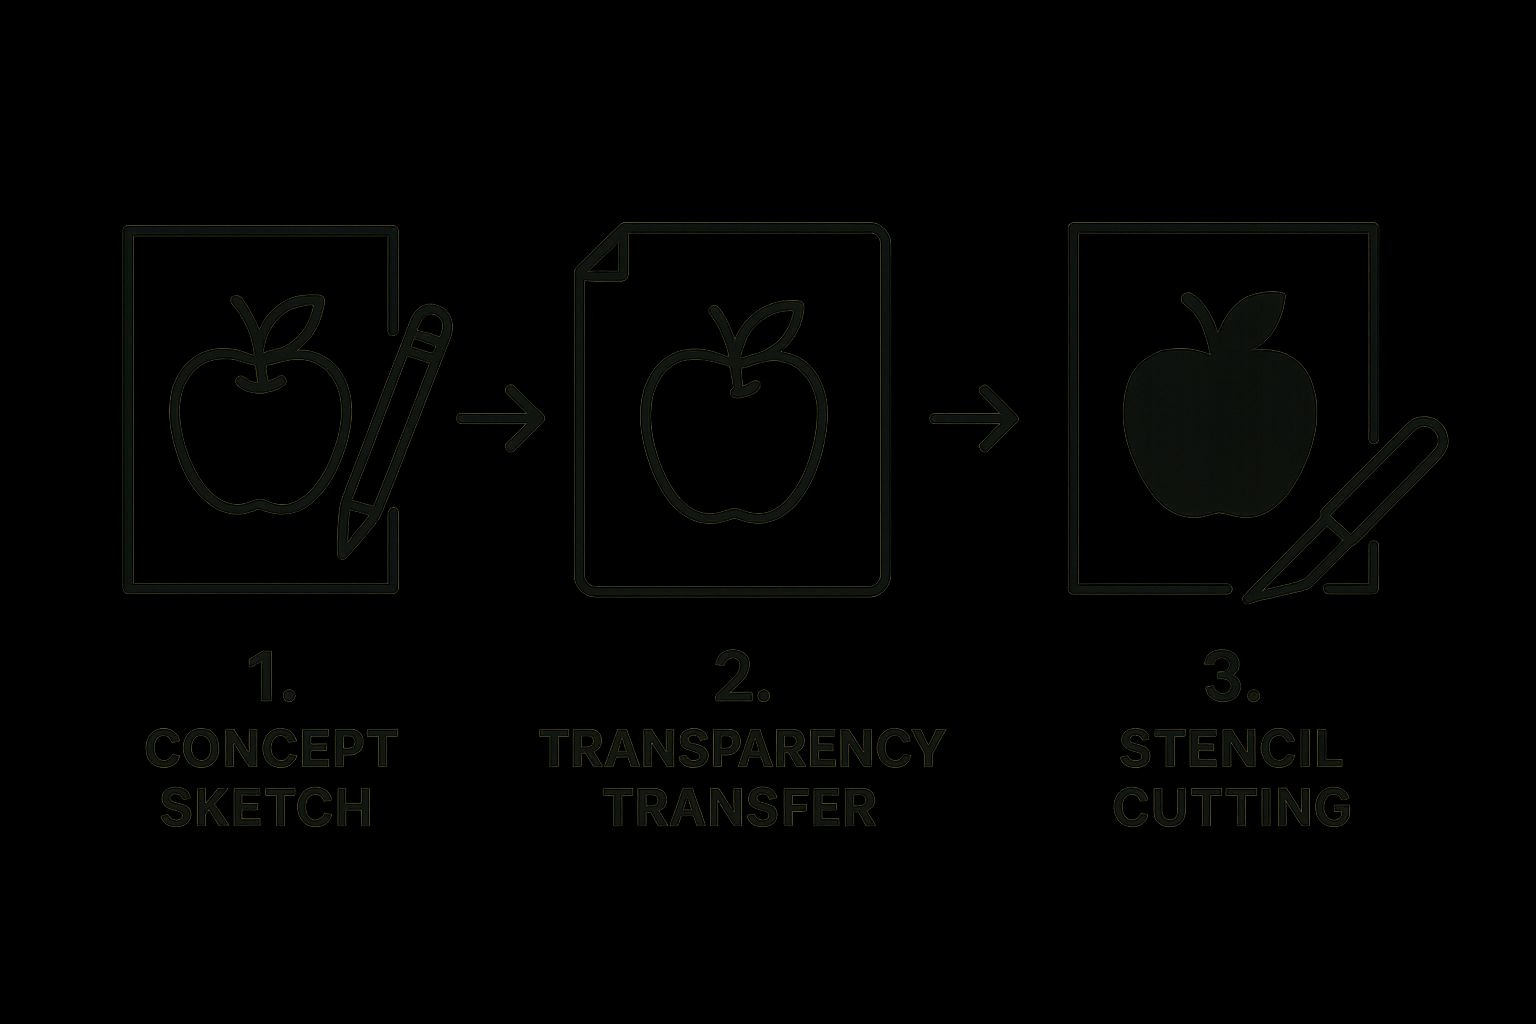
As you can see, each step builds on the last, turning your vision into a reality.
Choosing Your Ink: Water-Based vs Plastisol
Before we get to the final pull, let's quickly talk about your weapon of choice: the ink. The two main players are water-based and plastisol, and picking the right one depends entirely on your setup and what you're trying to achieve.
Here’s a quick comparison to help you decide what’s best for your home studio.
| Attribute | Water-Based Ink (Beginner Friendly) | Plastisol Ink (Industry Standard) |
|---|---|---|
| Feel on Shirt | Soft, breathable, soaks into the fabric | Thicker, sits on top of the fabric |
| Cleanup | Easy! Just soap and water. | Requires special solvents. |
| Screen Care | Dries quickly, can clog screen if you’re slow | Stays wet indefinitely, very forgiving |
| Curing | Air-dries, but heat-setting is recommended | Must be heat-cured at 320°F (160°C) |
| Best For | Home setups, soft-feel prints, easy cleanup | Commercial jobs, vibrant colors on dark shirts |
For beginners, I almost always recommend starting with water-based inks. The easy cleanup alone will save you a ton of headaches as you're learning the ropes.
Executing the Perfect Pull
Alright, your screen is flooded and your shirt is secure. It's go time. This is where your personal touch—your technique—really matters. The perfect pull is a confident blend of angle, pressure, and speed.
Grab your squeegee with both hands and tilt it to about a 75-degree angle. This sharp angle is critical; it cleanly shears the ink through the mesh instead of just pushing it around.
The goal is a single, smooth, and decisive motion. Hesitation is the enemy of a crisp print. Commit to the pull with confidence, maintaining even pressure from the start of the design to the very end.
Apply firm, consistent downward pressure as you pull the squeegee towards you in one fluid motion. You should feel the blade making clean contact across the entire design. Once you've passed the artwork, lift the squeegee, then lift the screen straight up.
Take a look. What you see on that shirt should be a sharp, beautiful replica of your art. It’s an incredible feeling—that direct connection between your hands and the finished product. This is the moment you officially become a screen printer.
Making Your Artwork Permanent and Washable
Alright, your design is on the shirt. It looks incredible—sharp, bold, and exactly how you pictured it. Take a moment to appreciate that. It's a huge milestone. But we're not quite done. There’s one final, absolutely critical step that turns that layer of ink into a permanent part of the fabric.
This is the curing process. Think of it like firing a piece of pottery in a kiln; it locks everything in place. Without it, all your hard work would literally go down the drain in the first wash. We’re going to use heat to forge a chemical bond between the ink and the cotton fibers, making your design as resilient as the iconic 'Notorious B.I.G.' mural in Bed-Stuy.
The best part? You don't need a giant, expensive conveyor dryer to get professional, lasting results. You can do this right in your own apartment with tools you probably already have.
Curing Your Print with Everyday Tools
The mission is simple: apply consistent, even heat across the entire print. The exact temperature and time will depend on the ink you're using (always check the manufacturer's instructions!), but a great rule of thumb for most water-based inks is to hit 320°F (160°C) for about 2-3 minutes.
Here are a couple of my go-to methods for curing at home:
-
The Household Iron: This is the OG method. It's accessible and gets the job done. Crank your iron to the highest cotton setting, making sure the steam function is off. Lay a piece of parchment paper or a thin scrap of cotton fabric over your design to protect both the print and your iron. Press down firmly on one section for 20-30 seconds, then lift and move to an overlapping section. Keep this up until you’ve given the entire design a full 2-3 minutes of heat.
-
The Heat Gun: Personally, I prefer this one because it gives you a bit more finesse. Hold the heat gun about 4-6 inches from the shirt and keep it moving in slow, even sweeps, like you're spray-painting. If you have an infrared thermometer (a super handy tool for any DIYer), you can use it to spot-check the temperature and make sure you're hitting that 320°F sweet spot.
Whatever you use, the name of the game is consistency. If you only heat the middle of your design properly, the edges will wash away. Give every single inch of your artwork the heat it needs to last a lifetime.
Once it's cured and has had a chance to cool down, your shirt is officially ready to wear and wash. For tips on keeping it looking fresh for years, check out our guide on how to wash graphic tees.
The Art of the Reclaim: Cleaning Your Screen
You've made your masterpiece, but the screen's job isn't over. It's time to "reclaim" it—to get it perfectly clean for your next creative spark. Treating your gear with respect is just as important as the printing itself. A well-maintained screen is a long-lasting screen.
First things first, scrape off all the extra ink with your spatula and put it right back in the container. No need to be wasteful!
Then, head to a sink or wash tub. A little lukewarm water and a soft, non-abrasive sponge are all you need to gently wash away the remaining ink. If you're using water-based inks, this part should be a breeze.
Erasing the Stencil for a Fresh Start
To get the screen completely blank and ready for a new design, you have to dissolve the hardened emulsion stencil. For this, you'll need a product called emulsion remover.
- After rinsing the ink out, leave the screen damp and apply the emulsion remover to both sides. Be generous with it.
- Let it sit and work its magic for about 30-60 seconds. You'll see the emulsion start to soften and break down.
- Grab a scrub brush and gently agitate both sides of the screen to help loosen up that old stencil.
- Finally, blast it clean. A high-pressure nozzle on a hose or even a detachable shower head works wonders here. The force of the water will wash away the softened gunk, leaving you with a pristine mesh, ready for your next project.
Adopting these modern, more eco-friendly cleanup habits isn't just good for your wallet; it's part of being a responsible creator. The screen printing market is booming—projected to hit $5.3 billion next year—but with that growth comes a responsibility to minimize our environmental impact. By using less harsh chemicals at home, you’re doing your part. For a deeper dive into industry trends, check out the full screen printing market report.
Your Screen Printing Questions Answered

Every creative journey, whether it starts in a sprawling Bushwick loft or at a simple kitchen table, begins with questions. As you get into screen printing your own t-shirts at home, you're tapping into a rich history of self-expression, joining a long line of artists who used this very medium to get their message out. This craft is your new language, and it's completely normal to have a few stumbles as you find your voice.
Think of the legendary street artists who transformed 5Pointz (just across the water from Brooklyn) or the industrial walls of the Bushwick Collective into world-famous art galleries—they didn't get it perfect on the first try. They experimented, they learned, and they just kept creating. This section is your personal guide through those initial hurdles, offering real-world answers to keep your creative momentum flowing.
What Is the Best Type of T-Shirt to Use?
When you're just starting out, think of 100% cotton t-shirts as your most reliable canvas. It's the gold standard for a reason. The natural fibers in cotton are incredibly receptive to water-based inks, absorbing them beautifully to create rich, vibrant prints that feel soft to the touch. It’s a forgiving fabric that will give you the satisfying results you need to build confidence.
A 50/50 cotton/polyester blend is also a fantastic choice, often giving you a print with a slightly faded, vintage aesthetic that’s very popular right now. I'd recommend holding off on 100% synthetic fabrics for a bit. They often require specialized inks and curing techniques that are trickier to handle without more advanced equipment.
Why Are My Prints Coming Out Blurry?
Ah, the blurry print. It's one of the most common frustrations for beginners, but the fix is usually quite simple.
The number one culprit? A lack of "off-contact." This is the tiny gap—about the thickness of a coin—between your screen and the shirt. This space is absolutely crucial because it allows the screen to snap away cleanly after you pull the squeegee, leaving behind a crisp, sharp line.
Next, check your squeegee pressure. It needs to be firm, confident, and even across the entire design. Finally, make absolutely sure your shirt is secured to your printing board and can't wiggle around. Any movement at all during the pull will almost certainly cause a smudge.
Just like a musician practices scales, a screen printer masters the fundamentals. The skills you build today—achieving perfect off-contact, consistent pressure, and flawless registration—are the foundation for every incredible piece you'll create tomorrow.
How Many Times Can I Reuse a Screen?
This is one of the most beautiful aspects of screen printing: its sustainability. With proper care, a single screen can last for thousands of prints. Seriously. The frame and mesh are designed to be incredibly durable workhorses in your creative studio.
The real secret to its longevity is how you treat it. After you finish a printing session, clean every last trace of ink out of the mesh immediately. When you're ready for a new design, an emulsion remover will dissolve the old stencil, giving you a fresh, clean canvas to work with. As long as you protect the mesh from rips and tears, that screen will be a trusted creative partner for years to come.
Is It Possible to Print Multi-Color Designs at Home?
Absolutely! Printing with multiple colors is the next exciting chapter in your screen printing adventure. The process involves creating a separate screen for each color in your design. Brooklyn's own Jean-Michel Basquiat, who was born in Park Slope and started his career as part of the graffiti duo SAMO©, often layered colors and textures in his work. You can bring that same dynamic energy to your tees.
The main challenge is "registration"—the art of making sure each color layer lines up perfectly with the others. You can create simple registration marks (like small crosses) on your transparency films and your printing board to serve as guides. My advice? Start with a simple two-color design to get a feel for the alignment process before you tackle more complex, multi-layered artwork.
This skill not only elevates your designs but also connects you to a deeper level of craftsmanship. When you start building a relationship with your customers through unique, multi-layered designs, you begin to understand the core principles of increasing customer lifetime value by offering something truly special.
At The Brooklyn Initiative, we believe every shirt tells a story. We pour our love for Brooklyn's culture into every limited-edition design, creating wearable art that's as unique as the borough itself. Explore our collection and wear a piece of the story at https://thebrooklyninitiative.com.