


You've got a canvas leaning against the wall, a pencil in one hand, and that split-second hesitation before the first hole goes in. That moment matters, because good art hanging is less about courage than sequence, pick the wall, pick the scale, measure once, then measure again before the drill ever comes out. In a Brooklyn apartment, a brownstone parlor floor, or a loft with exposed brick, the difference between polished and awkward usually comes down to a few inches and the right hardware, not luck.
A simple homeowner kit helps more than people expect, especially when you're trying to avoid the classic mistake of putting a beautiful piece too high or too small. If you want a quick refresh on the basics you'll use, the Value Tools Co homeowner tool guide is a solid place to check your toolbox before you start.
The Moment Before the First Hole
The room usually tells you what wants to happen if you pause long enough. A narrow hallway wants one strong vertical piece. A sofa wall can handle a larger canvas or a measured cluster. A big, blank living room wall in Brooklyn usually looks best when the art feels intentional enough to hold its own, not like a last-minute afterthought.
That first decision is the one many rush. They grab the closest wall, then fight the scale later. I've seen plenty of rooms where the art wasn't bad at all, it was just in the wrong place, competing with a lamp, floating too high above a couch, or squeezed into a corner that didn't give it room to breathe.
Practical rule: choose the wall first, then the composition. If the room needs one hero piece, let it be one hero piece. If it needs a cluster, treat the whole cluster as a single shape on the wall.
Before you mark anything, clear the furniture line, remove distractions, and look at the wall as a whole surface. If you're hanging a Brooklyn-themed canvas, think about how the image relates to the room's energy. A subway-inspired print can anchor an entry. A vintage street sign canvas can sharpen a den. A warmer summer-in-Brooklyn image can soften a bedroom.
For size planning, The Brooklyn Initiative's canvas print size chart is useful because it helps you match art to wall width before you commit to a layout. That step saves a lot of regret later, especially in rooms where one wrong proportion makes everything else feel off.
Measuring for the 57-Inch Centerline
A tape measure, a pencil, and a level solve most hanging problems before the first hole ever goes in. The old gallery standard still earns its place because it turns a loose idea into a mark you can use. Major guidance sources place the center of artwork around 57 to 60 inches from the floor, and Christie's notes that modern and contemporary works typically hang at 1.55 metres, about 61 inches, to the middle of the picture. That gives you a practical centerline even though eye level shifts from room to room and person to person. Christie's also recommends double fixings on either side for flat art instead of a single central fixing, which keeps the piece straighter and steadier once it is on the wall. Christie's hanging guidance summary
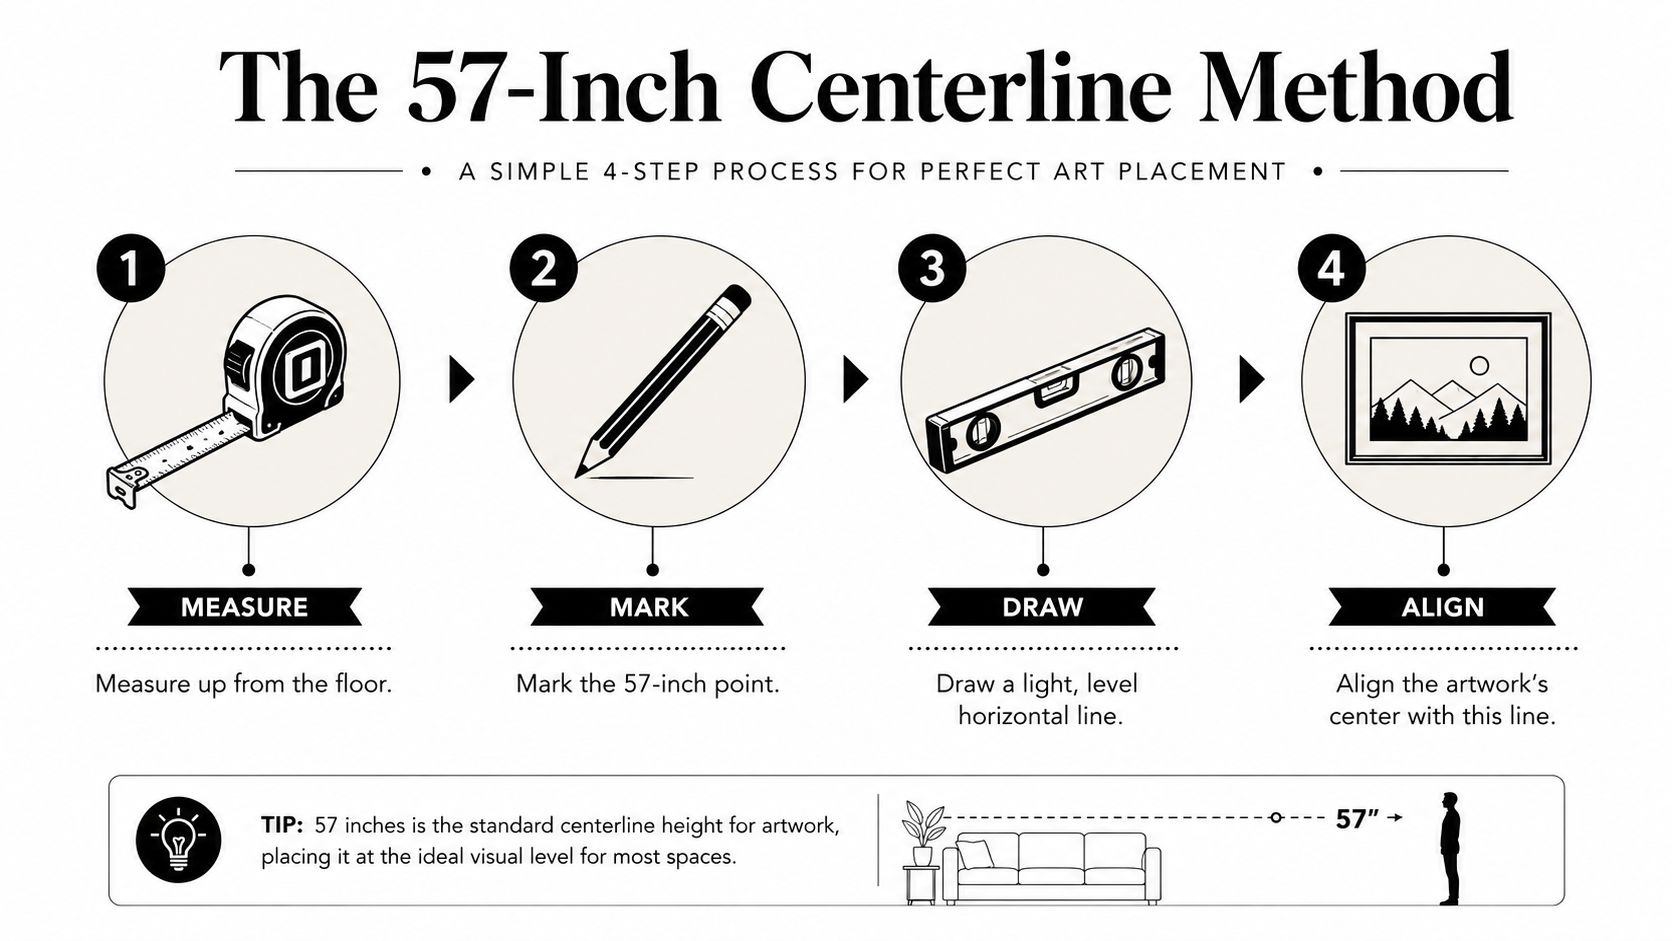
Start by measuring from the floor up to 57 inches, then make a light pencil mark and extend a level horizontal line through that point. After that, measure the full height of the artwork, divide by two, and subtract the distance from the top edge to the hanging hardware. The number you get is where the hook belongs so the center of the piece lands on the line.
A 24-by-36 Canvas Example
A 24-by-36-inch canvas makes the math easy to see. Its center sits at 18 inches from the top or bottom edge, because the total height is 36 inches and you divide by two. If the hanging hardware sits 2 inches below the top edge, the hook does not go at the centerline. It goes 20 inches above the centerline mark, because the hardware offset has to be added back into the calculation.
That extra step prevents the common mistake of hanging art too high. I see it all the time in Brooklyn apartments, where a piece starts strong on the floor and then drifts up the wall once the owner starts guessing at eye level. The same formula works above a sofa, over a bed, or in a hallway, because the wall may change but the relationship between the art, the hardware, and the centerline does not.
For sizing decisions, The Brooklyn Initiative's canvas print size chart helps you match the canvas to the wall before you drill, which is the point where mistakes become permanent. It is especially useful in rooms where the wrong proportion makes a good piece feel too small or too dominant.
Choosing the Right Hanging Hardware
Hardware fails when it's matched to the wrong wall or the wrong load. A light canvas on drywall can do fine with a simple hook, while a heavier frame or a more demanding surface needs anchors that are meant to bear more stress. The smartest move is to think in weight classes instead of grabbing whatever's in the junk drawer.
| Hanging Hardware by Weight Class | Recommended Hardware | Best Wall Type |
|---|---|---|
| Light | Picture hooks, small nails | Drywall |
| Medium | Plastic anchors, threaded wall plugs | Drywall, plaster |
| Heavy | Masonry screws, toggle bolts, concrete anchors | Concrete, brick, heavier assemblies |
The trade-off is always speed versus security. Picture hooks are fast and clean, but they're only right when the wall and weight agree. Plastic anchors and threaded wall plugs give you more support, but they only work if the pilot hole is clean and the substrate is sound. Heavy pieces need a more serious fastening plan, especially on old walls that don't forgive guesswork.
A single central nail might seem tidy, but flat art hangs straighter and more stably with two-point support. The load stays balanced, and the frame is less likely to twist over time.
If you're comparing mounting systems for different room conditions, the secure mounting for any wall resource is useful for thinking through what kind of support structure matches the surface in front of you. That's especially helpful when you're deciding whether the issue is the art, the wall, or both.
For Brooklyn canvas pieces, lighter ready-to-hang formats usually simplify this step because the wall doesn't need to do as much work. But the hardware still has to be right, because “lightweight” doesn't mean “careless.”
Hanging on Drywall, Plaster, Brick, and Concrete
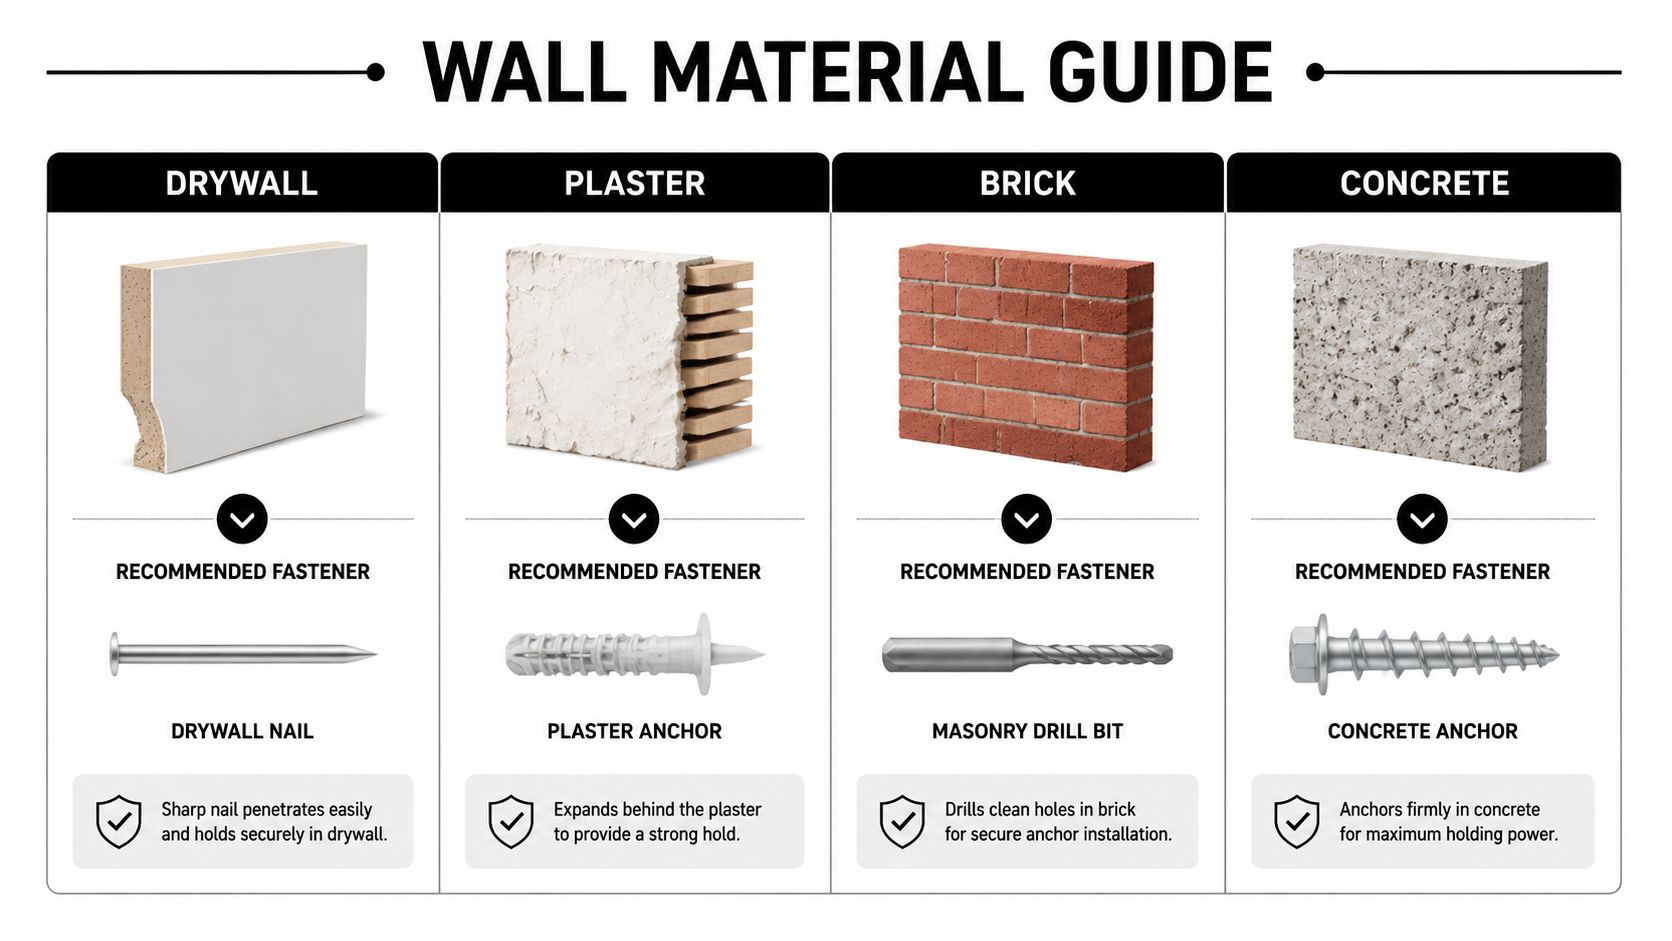
Drywall is the easiest surface to underestimate. It can take a standard hook-and-anchor setup just fine for lighter art, but missing the stud means you're relying on the wall board alone. If the piece is heavier, or if the wall gets bumped often, the anchor choice matters more than the nail itself.
Plaster is where Brooklyn brownstones humble people. Drill too fast and you can chip the surface. Drill too aggressively and the repair becomes more annoying than the hanging job. Slow speed, a careful pilot hole, and attention to what's behind the plaster, often lath, make the difference between a clean result and a cracked patch that needs repair.
Brick and concrete are a different game entirely. They usually call for a hammer drill and masonry-rated bits, not a standard drill bit that burns out halfway through the job. One practical guideline from hanging guides is to make the pilot hole about 1/4 to 1/2 inch deeper than the screw length, and to embed the screw at least 1 inch into the concrete for security. Concrete wall hanging guidance
Match the Wall to the Fastener
The key is not to force one method onto every surface. Specialist hanging guides separate methods by load class, with adhesive frames for light items, hardwall hooks for medium items, and masonry screws or anchors for heavy items. That split makes sense because the wall itself determines how the load gets transferred. Concrete load-class guidance
For an angled or irregular surface, standard eye-level advice isn't enough. Slanted-wall guidance focuses on measuring fastener spacing, accounting for the angle, and using keyhole hangers, chain, or adhesive systems for lighter pieces. That's a real niche, but it matters for attics, lofts, and A-frame rooms where the wall isn't vertical and the usual rule doesn't solve the actual problem. Slanted wall hanging guidance
Arranging a Gallery Wall That Works
A gallery wall fails fastest when every frame behaves like it is hanging by itself. A strong layout treats the cluster as one visual block, not as separate objects sharing a wall. The spacing, the center height, and the outer edges all need to relate to the furniture or wall beneath them.
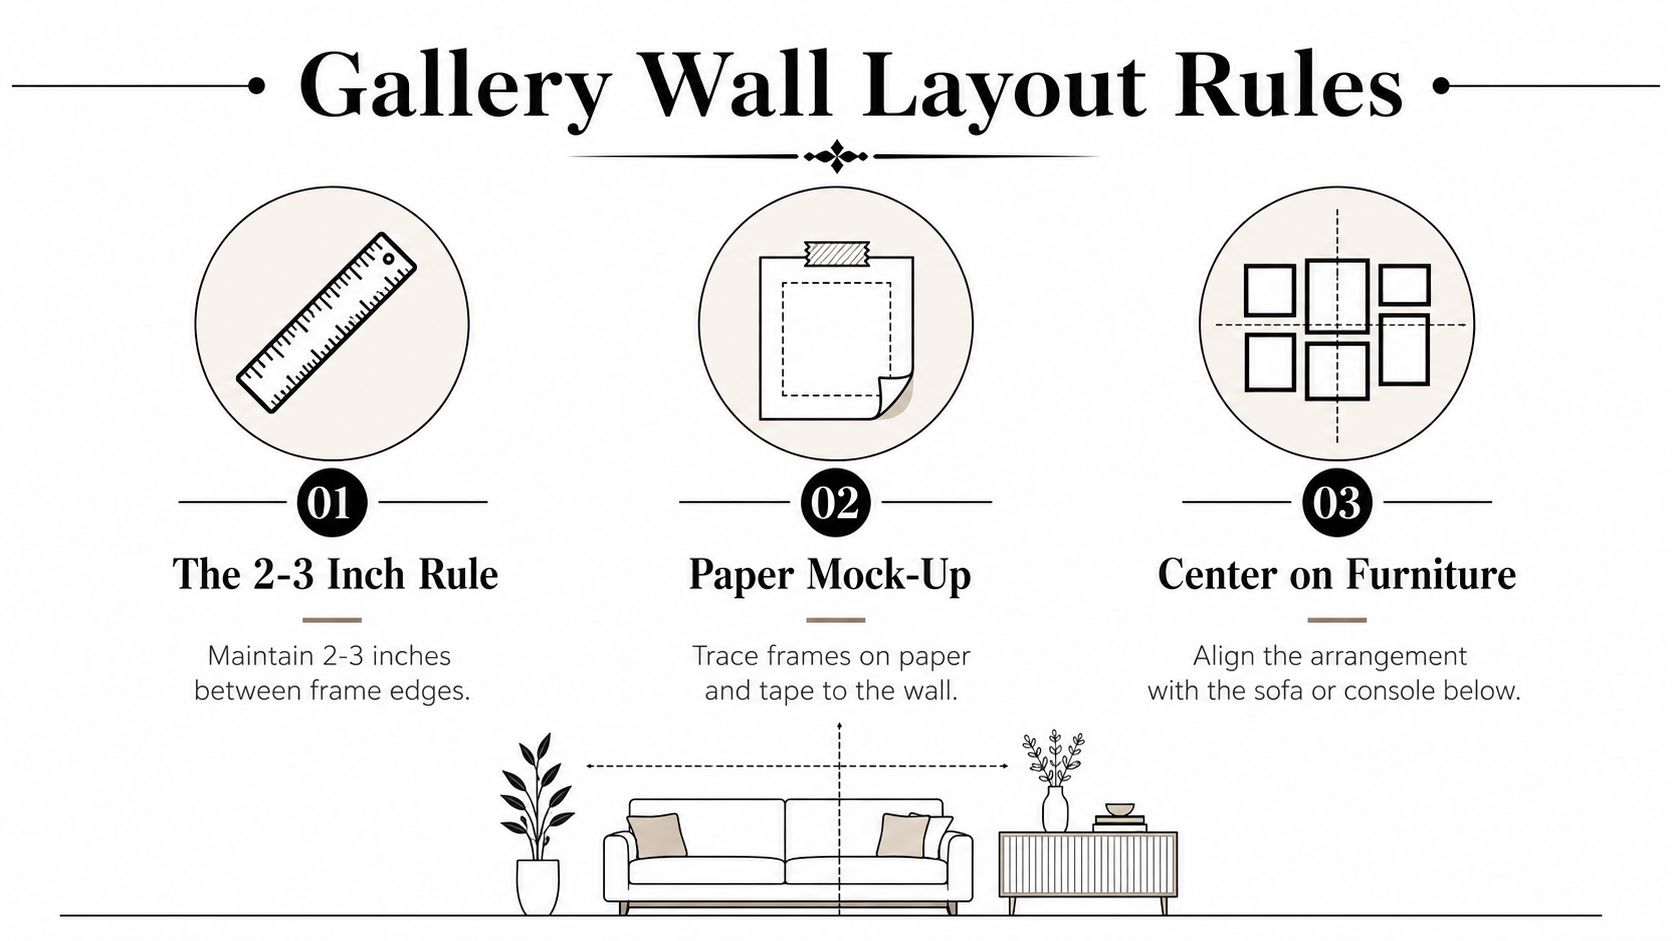
Spacing is where layouts often go wrong. Expert guidance commonly lands on 3 to 6 inches between frames for gallery-style arrangements, while tighter grids often use about 2 to 3 inches between pieces. Furniture-based rules also matter, because wall art above a sofa, bed, or console usually looks best when it is roughly 50 to 75% of the width of the furniture, with some design rules putting the ideal at about two-thirds. A related balance rule keeps art to no more than 60% of wall space so the composition has enough negative space around it. Apartment Therapy hanging measurements
If the wall feels crowded, the cluster is probably too tight. If it feels disconnected, the art is probably too high or too far apart.
A good layout starts on the floor, then moves to paper. Trace the frames, tape the paper templates to the wall, and adjust until the arrangement feels like one composition. That method saves holes, especially when the room has a console, radiator, or light fixture that could throw off the balance.
For a stronger visual direction, the layout should match the kind of art you are grouping. A set built around Brooklyn imagery, street signs, vintage typography, or neighborhood photography benefits from a clearer anchor and less random spacing, which is why the ultimate guide to Brooklyn wall art is useful before you commit to holes. If the wall has a lot of visual noise already, simplify the mix and let one image or one repeated frame size carry the composition.
Lighting changes the read of a cluster too. Recessed spots can create glare or shadow on the pieces, so targeted recessed lighting tips are worth checking before you finalize placement. A gallery wall that feels balanced in daylight can read very differently once the lights are on.
Hanging Ready-to-Hang Brooklyn Canvas Pieces
A gallery-wrapped canvas cuts out one of the slowest parts of hanging art, the frame decision. That matters on a real job because it leaves fewer variables between unboxing and putting the piece on the wall. The built-in hanging setup is usually straightforward, the piece tends to weigh less than a framed equivalent, and the wrapped edge keeps the look clean without extra trim around it.
If you want a clear explanation of the format before you buy, gallery-wrapped canvas explanation lays out why it hangs differently from framed art. That difference shows up in the room immediately. You spend less time matching moldings, glass, and frame profiles, and more time deciding the right wall position.
A ready-to-hang canvas also changes the buying decision. You can choose a piece that fits the wall without planning for a separate framing budget or waiting for a custom order to come back. That makes a difference in Brooklyn apartments, where a blank wall often needs to be solved now, not after another round of measuring.
What Changes With Canvas
The centerline still matters, but the offset is easier to control because the format is already built for hanging. In practice, that means less guesswork at the wall and a cleaner install for rooms that need a direct result. It also means a canvas can work well when you want art up quickly and do not want to manage another layer of materials.
Brooklyn-themed pieces can carry a wall on their own. Subway imagery, vintage typography, street-sign graphics, and warmer city scenes all work as single anchors when the rest of the room is busy. I use that approach often in narrow living rooms, hallways, and above-sofa spots where one strong image reads better than a cluster that keeps splitting attention.
A single hero canvas usually gives a room more clarity than a crowded mix. One centered piece over a sofa can solve the wall without making the space feel restless, especially when the art has a clear subject and enough open space around it. If a second piece belongs nearby, it should support the first one, not compete with it for the eye.
The cleanest result is usually the simplest one. A measured centerline, a properly sized canvas, and enough breathing room around the image make the wall feel settled instead of overworked.
Troubleshooting and a Final Pre-Hang Checklist
A piece that leans forward usually needs support at the lower corners. Felt bumpers can counter that tilt, and wire-hung frames often need the back stabilized so they sit flatter against the wall. If the anchor gives out, the fix is usually not a bigger nail. It is the right anchor for the wall, which may mean moving from a weak spot to a toggle bolt or a masonry fastener.
Crooked art is often a wall problem, not a patience problem. Old Brooklyn walls are not always plumb, so a level line on the wall matters more than your eye alone. If the piece still looks off after you level it, trust the measurements instead of the urge to nudge it a little. That is how a clean hang turns into a chain of small errors.
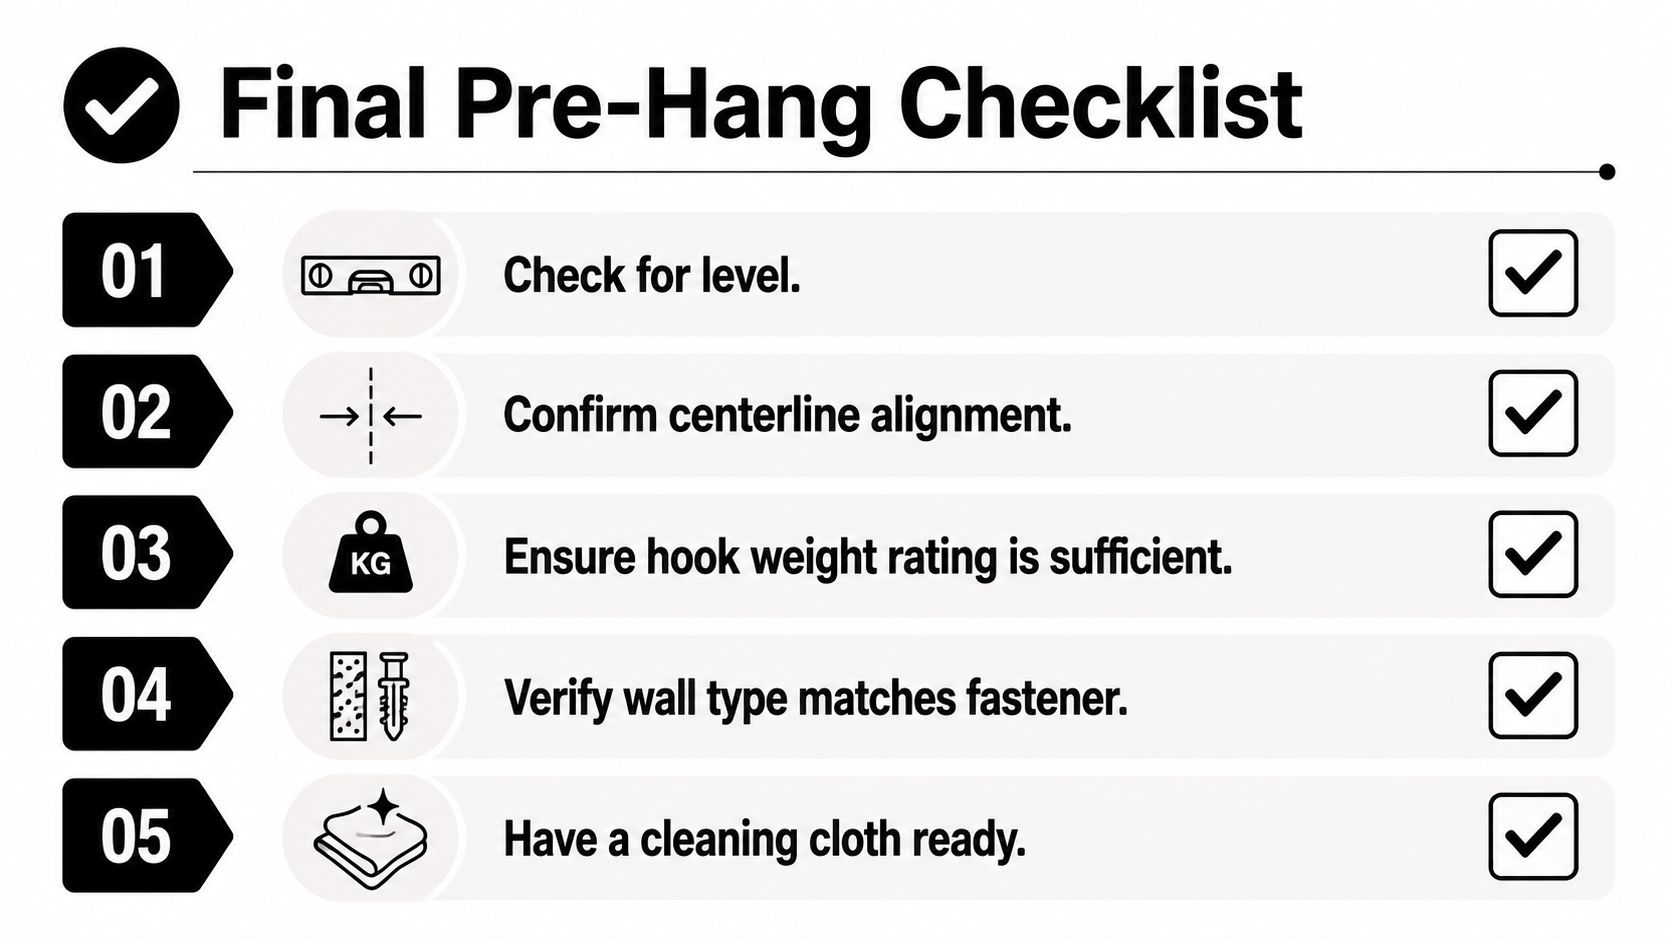
A final check keeps the job calm and keeps you from reopening holes you do not need.
- Check for level.
- Confirm centerline alignment.
- Ensure hook weight rating is sufficient.
- Verify wall type matches fastener.
- Have a cleaning cloth ready.
The work gets easier every time you do it. After a few hangs, the wall stops feeling risky and starts feeling editable, which is usually how better rooms get made.
If you want Brooklyn wall art that arrives ready to hang and keeps the decision-making simple, choose a canvas piece that fits the wall before you reach for the drill. That gives you a cleaner path from measuring to living with the art faster, without adding another frame order to the process.